

Deb Tromblay
By Deb Trombley
Photos courtesy: Deb Tromblay via paintandpattern.com
A perfect place to find peace and quiet for a masalamomma while curling up with a favourite book!
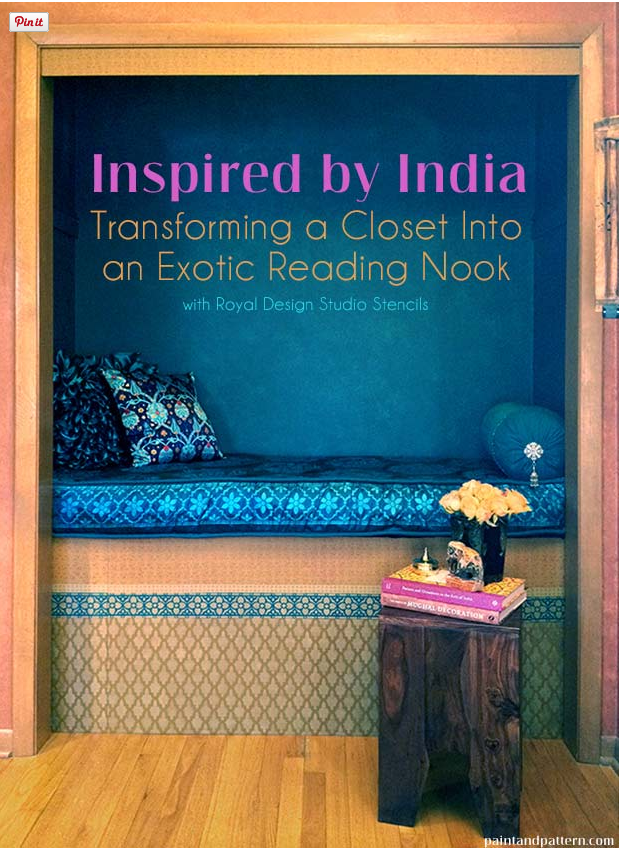
Can paint turn a plain white space in your home into an exciting extravaganza of Indian-Moroccan patterns and color? Why, yes! Here’s a dramatic Indian inspired DIY stencil project/closet transformation that did just that. Paint and stencil patterns took it from neglected storage space to exotic, luxurious sitting nook. It involves a custom-built stenciled storage bench topped with a luxurious, hand-stenciled silk cushion. It is done in a small space, but is a project too big and bold to fit into one blog post. So, here is Part 1…
How do you go about transforming a closet into your own personal sanctuary? First things first, obviously an empty closet is needed. As most closets are, this closet was once full of things. You may think you cannot spare a closet, but I hadn’t touched anything in this closet for years. So honestly, were those things really needed? Was the storage space for them really needed? If you have a storage area like that in your home, perhaps it could be turned into a nook space that’s not only beautiful but useful too. Nooks are places to curl up with books. They’re intimate spaces to sit and give attention to a family member, friend or a pet. They’re a comfortable spot to put your feet up and go online and… visit Paint and Pattern!
After clearing the closet, the walls were painted a deep color with several shades of teal paint that were applied to the walls with a large sea sponge to create a mottled “old wall” feel. Learn more about how to paint the new walls to look old here. That alone was a major change, but I wanted even more. After drooling over my Pinterest boards of highly-patterned, decadent rooms in India and Morocco, I wanted that visual feast in my midwestern American house, even if it’s just a closet-sized corner.
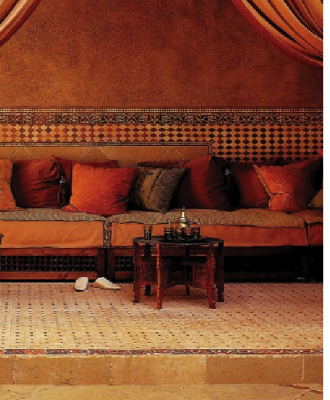
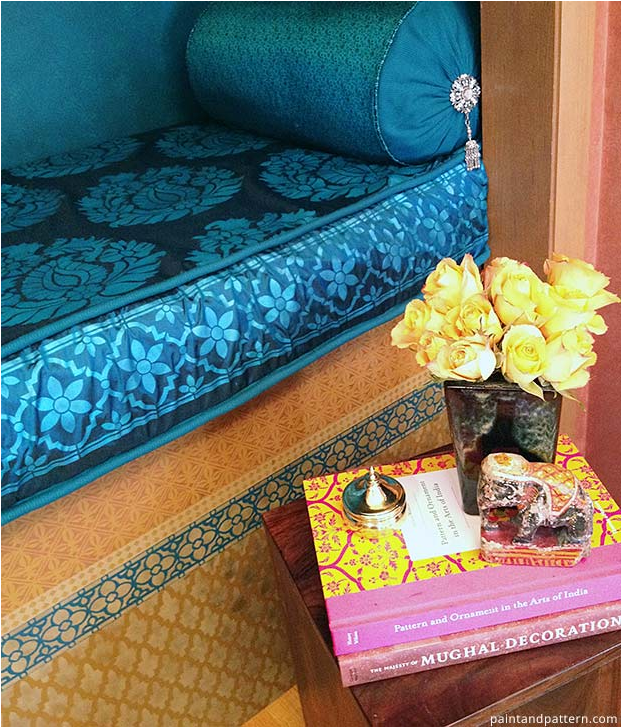
This photo, with its bold color, mix of patterns, cushioned bench and piles of pillows was the inspiration for the closet nook.
To create this multi-patterned look, three areas were stenciled:
- Front of a storage bench
- Bench cushion fabric
- Valance at top of closet opening
Today’s post will cover the process for stenciling the wooden storage bench. If you want to create the layered pattern look of the storage bench, my best suggestion is to freely mix up some stencil patterns. Mix border and allover stencils together. Use geometric patterns with florals. Also, push a little bolder with color and instead of using one background color, choose a variety of paint colors. Royal Design Studio has a great selection of stencils in their Indian Stencils Collection and Moroccan Stencils Collection, that will work perfectly for this project.
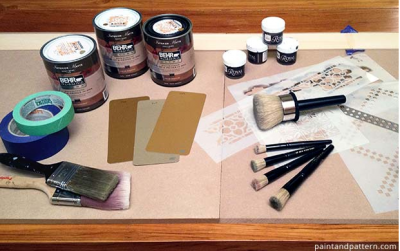
Here are the supplies I used for this stencil project:
- A mix of Moroccan stencils from Royal Design Studio: Flower Chain Border Stencil, Small Moroccan Arches Stencil, Squared Diamonds Moroccan Stencil, Tulip Tiles Stencil
- Antique Gold Stencil Creme Paint
- MDF board from Home Depot – a grain-free surface is desirable for this look
- Behr Premium Plus Ultra paints in Collectible, Olympic Bronze and Spice Bazaar for natural colors, and Realm for the teal color.
- Benjamin Moore paint in Georgian Brick
To create the bench front, I used MDF boards from Home Depot. They are cut so a large door can swing open to access storage under the seat cushion. You might be able to see the seam in photos, where the two boards meet.
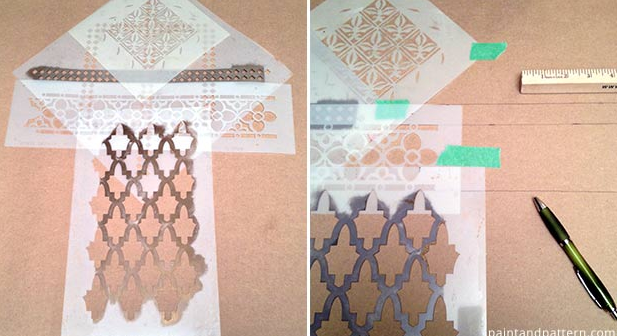 To determine where you want to paint the patterns first play with and lay out your stencils where you want them. This will give you a great “visual” from which to plan. Then figure out the sizes of the different areas that you will place the stencil patterns onto. It’s always good to go into a project like this with a plan!
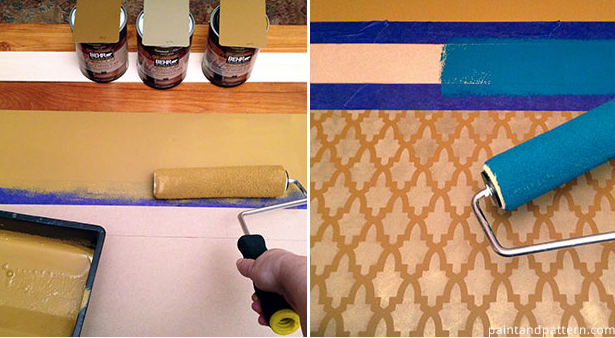
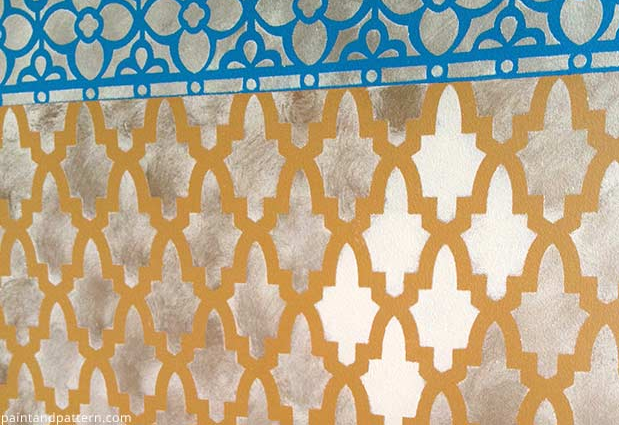
Each pattern has a background color behind it, then the stencil is painted in a different color, over the background stripe. Use the width of the patterns as a guide to lay down painter’s tape for your striped backgrounds. Mark your tape lines with a yardstick and a pen or chalk. I used a darker background color on the bottom and lighter colors on top stripes because I prefer to see darker “weight” on the bottom. And for contrast, I put a stripe of teal about a third of the way down because I knew the seat cushion would be teal, and this would repeat the stripe color. This helps tie the whole look together between the cushion and the bench front.
Pro DIY Stencil Project tip!
Here’s the secret to getting a luxurious shimmer on top of the color: After painting a stencil with latex paint, but before removing the stencil, swirl a very light coat of Antique Gold Royal Stencil Creme over the pattern. Your brush should be almost totally dry. If you use a light enough pressure, the gold will be more transparent. You’ll still see the first color, but with a metallic sheen on top. I did this on all the patterns on the bench. It adds a dressy antiqued look, and helps to tie all the patterns and colors together.
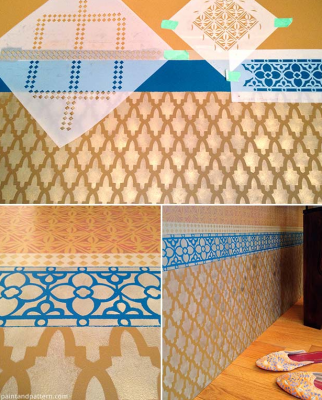
You can see the final Indian inspired DIY stencil project finished above. I am THRILLED with how it all came together. In the NEXT post about this project, I will share the silk-stenciled bench using some new patterns from the Indian Stencils Collection by Royal Design Studio and more Royal Stencil Creme Paint. Stay tuned!!!
This post was originally published on Deb’s Blog called the nomadic decorator via paintandpattern.com
There are no comments
Add yours